Articles
Back to articles
Conversion of an existing vaulted grill oven to an indirectly fired flat bread oven.
In September 2004, I have helped Norbert Senf to build a customer-designed custom wood-fired oven complex for the "Back Alley BBQ & Grill" restaurant at Toronto's Kensington Market. The complex, designed by the owner under Norbert's consulting service, originally consisted of one pizza/bread oven of somewhat unconventional design, two grills and one rotisserie oven - all vaulted ovens of different style. A year or so later, I was asked to do some work on the pizza oven to improve its performance. Bringing the oven to classic proportions and improving its shape was very successful and made the oven much more efficient.
A couple of weeks ago, shifting focus of the restaurant to flat breads, Frank Hsu, the owner, asked me to convert one of the vaulted grill ovens to an indirectly fired flat bread oven. His requirement was that the oven should be fired using a firebox underneath the oven's hearth with an option to build a fire inside the oven. He also wanted to have an option to do some grilling inside, when oven is not used for baking. The oven is planned to be used for baking 24/7.
Here is the short report on this project that was just recently completed:
Idea for the oven:
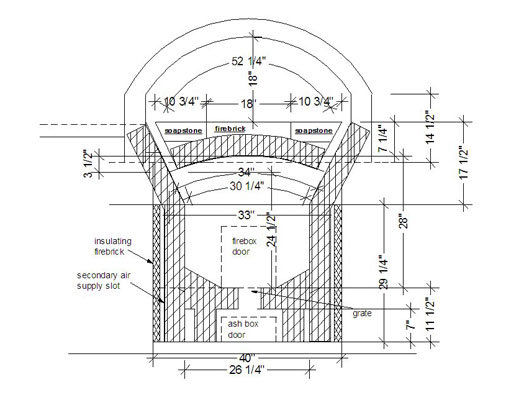
A large firebox is taking most of the space underneath the oven's hearth. The firebox is span with 4 ?" vaulted ceiling. Firebox ceiling vault supports oven hearth made of 3" thick used soapstone slabs that Frank had on hand. The firebox has 6 slot-like angled exists that get reduced in size, coming up to the oven's chamber, and exiting along the oven's vault at the sides. The firebox has two rows of secondary air supply slots for cleaner combustion: one located at the middle and one right at the beginning of the exits. Firebox also is equipped with two small narrow grates and wide air supply slot behind the firebox door.
Facing for the firebox is done in firebrick laid on the edge to match existing firebrick work around, and is insulated with 2" of mineral wool.
Height from the finished hearth to the top of the vault: 18". Existing vault gets extended another brick (9") to form a new throat, and another arch is built inside the existing vault to reduce height, forming a lip, leading to the throat. A smoke chamber/channel is extended on top to connect new throat to the existing chimney.
Front part of the oven's firebox is cantilevered 12" from existing concrete foundation and is supported on steel angles, coming from behind under the firebox walls.
On my opinion, such design should have several advantages:
- Clean combustion with excellent mixing of the gases as a result of favorable influence of the shape of the firebox top, of narrowing exit slots with secondary air supply outlets and of the long smooth flame paths coming into the vault along the curve in opposite directions;
- Even heating pattern created by having 6 firebox exits located along the vault's length;
- Considerable heat-storing mass of 4 ?" thick firebrick vault with 3" of soapstone on top that allows time to saturate the 4 ?" thick vault with heat and to balance temperatures inside the oven in 24/7 use;
- Minimal space taken by firebox exists, leaving central space for convenient baking;
- Grilling is possible on removable racks placed over the firebox exits.
Two of us: Sergei Kouznetsov, my apprentice, and myself have converted the oven in 52 working hours.
Drawings and pictures with comments:
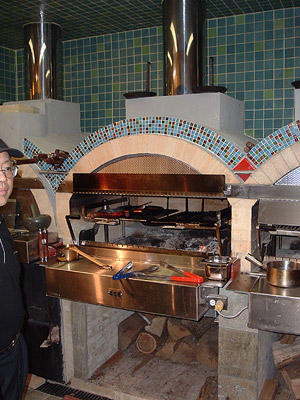
Grill Oven before.
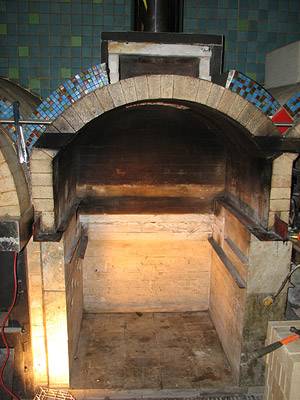
The grill unit is removed. Stainless steel angle at the front and grease filter holder under the chimney are also removed. Ready to start building.
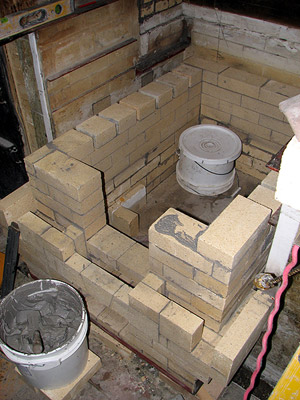
Firebox is going up. Note facing with gap for insulation an row of lower secondary air supply outlets.
Slot for grate in the firebox floor, secondary air supply outlets at the middle and at the beginning of the exit slopes, and steel harness for the firebox vault can be seen.
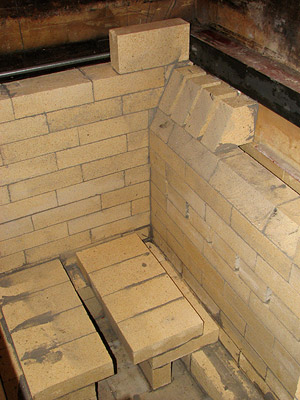
Beginning of the firebox vault.
Angled support bricks for the vault are forming angled exit slots.
Sergei is cleaning the finished vault from inside.
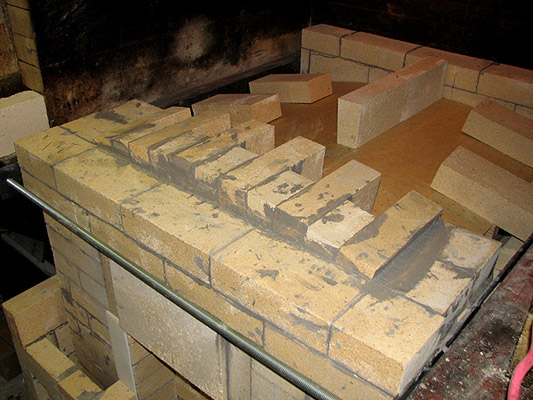
Finished firebox vault. Exit slots with bricks that are going to support edges of soapstone slabs. Note mineral wool insulation between the core and the facing.
Close-up of the finished firebox vault. Recalling Lars Helbro's "centrifugal carburetor oven" (http://www.stenovne.dk/englishcentrifugalcarburator.html), I have decided to call this oven a "six-cylinder oven". :)
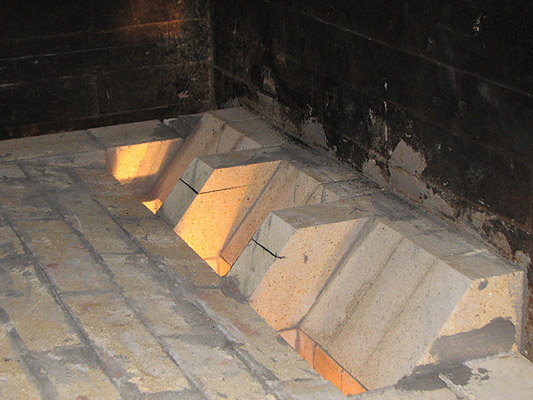
Close-up of the exit slots.
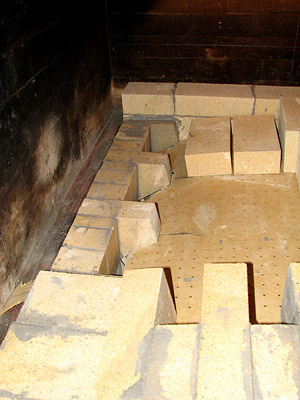
The vault edges are leveled with firebrick "shims". The vault is ready to accept soapstone slabs.
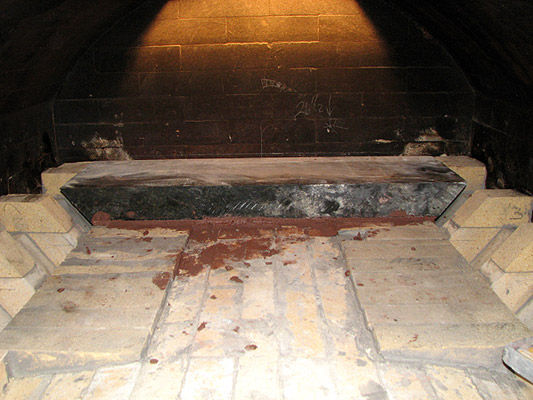
The first soapstone slab is placed. It is set in clay mortar.
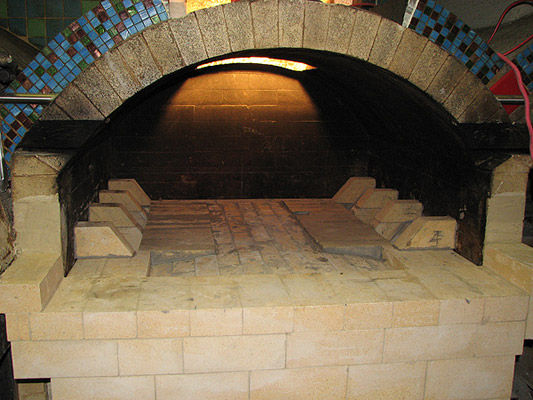
All pieces of soapstone are in. The internal arch, forming a lip can be seen at the front. Grease filter opening in the oven's vault is blocked with arch firebrick.
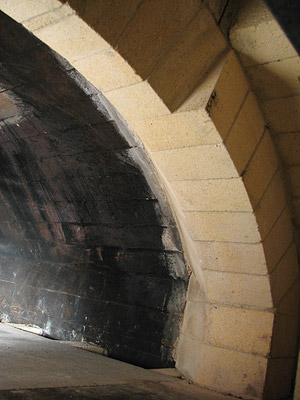
Internal arch. Forming lip and throat transition.
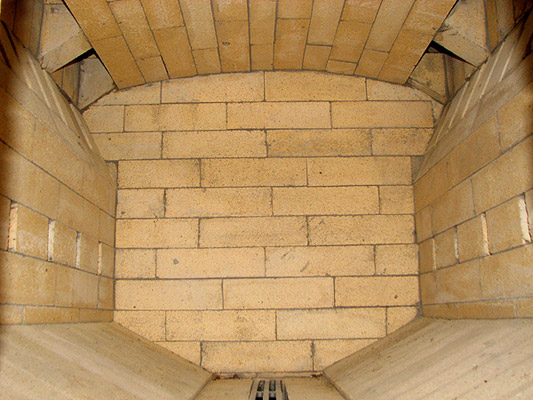
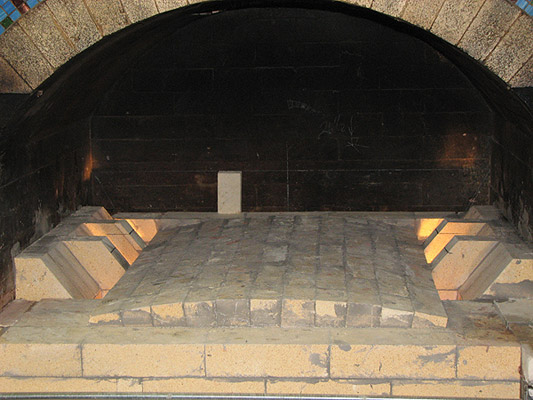
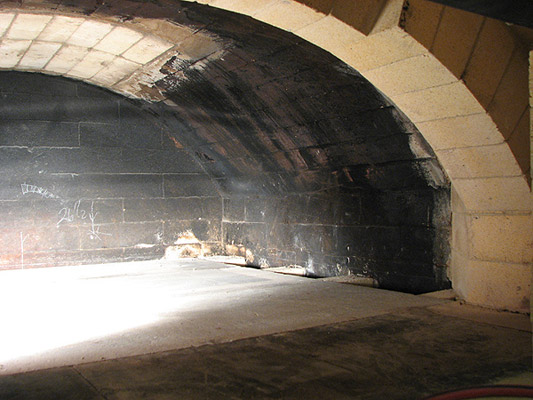
Finished firebox inside.
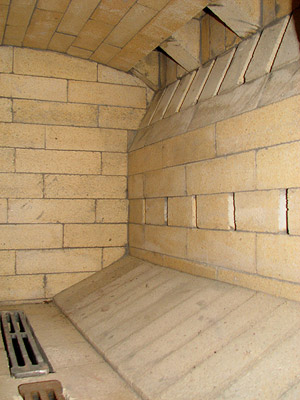
Finished firebox inside.
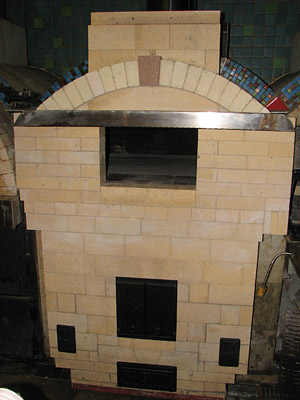
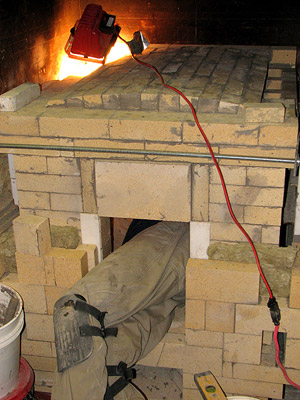
Front outside view of the finished unit.
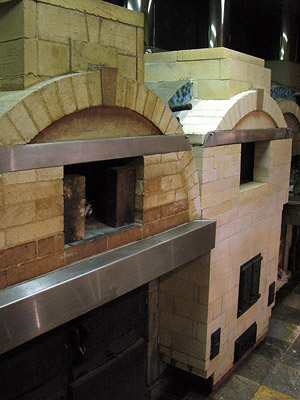
Side view of the finished unit next to the oven, refinished 3 years before.
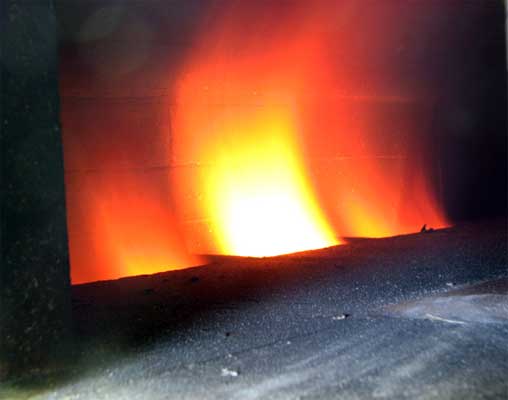
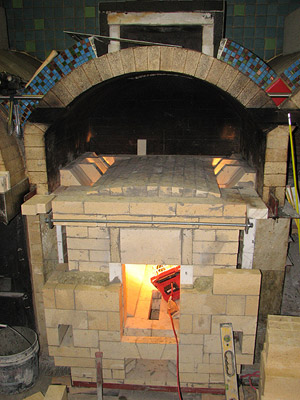
Oven during firing.
|